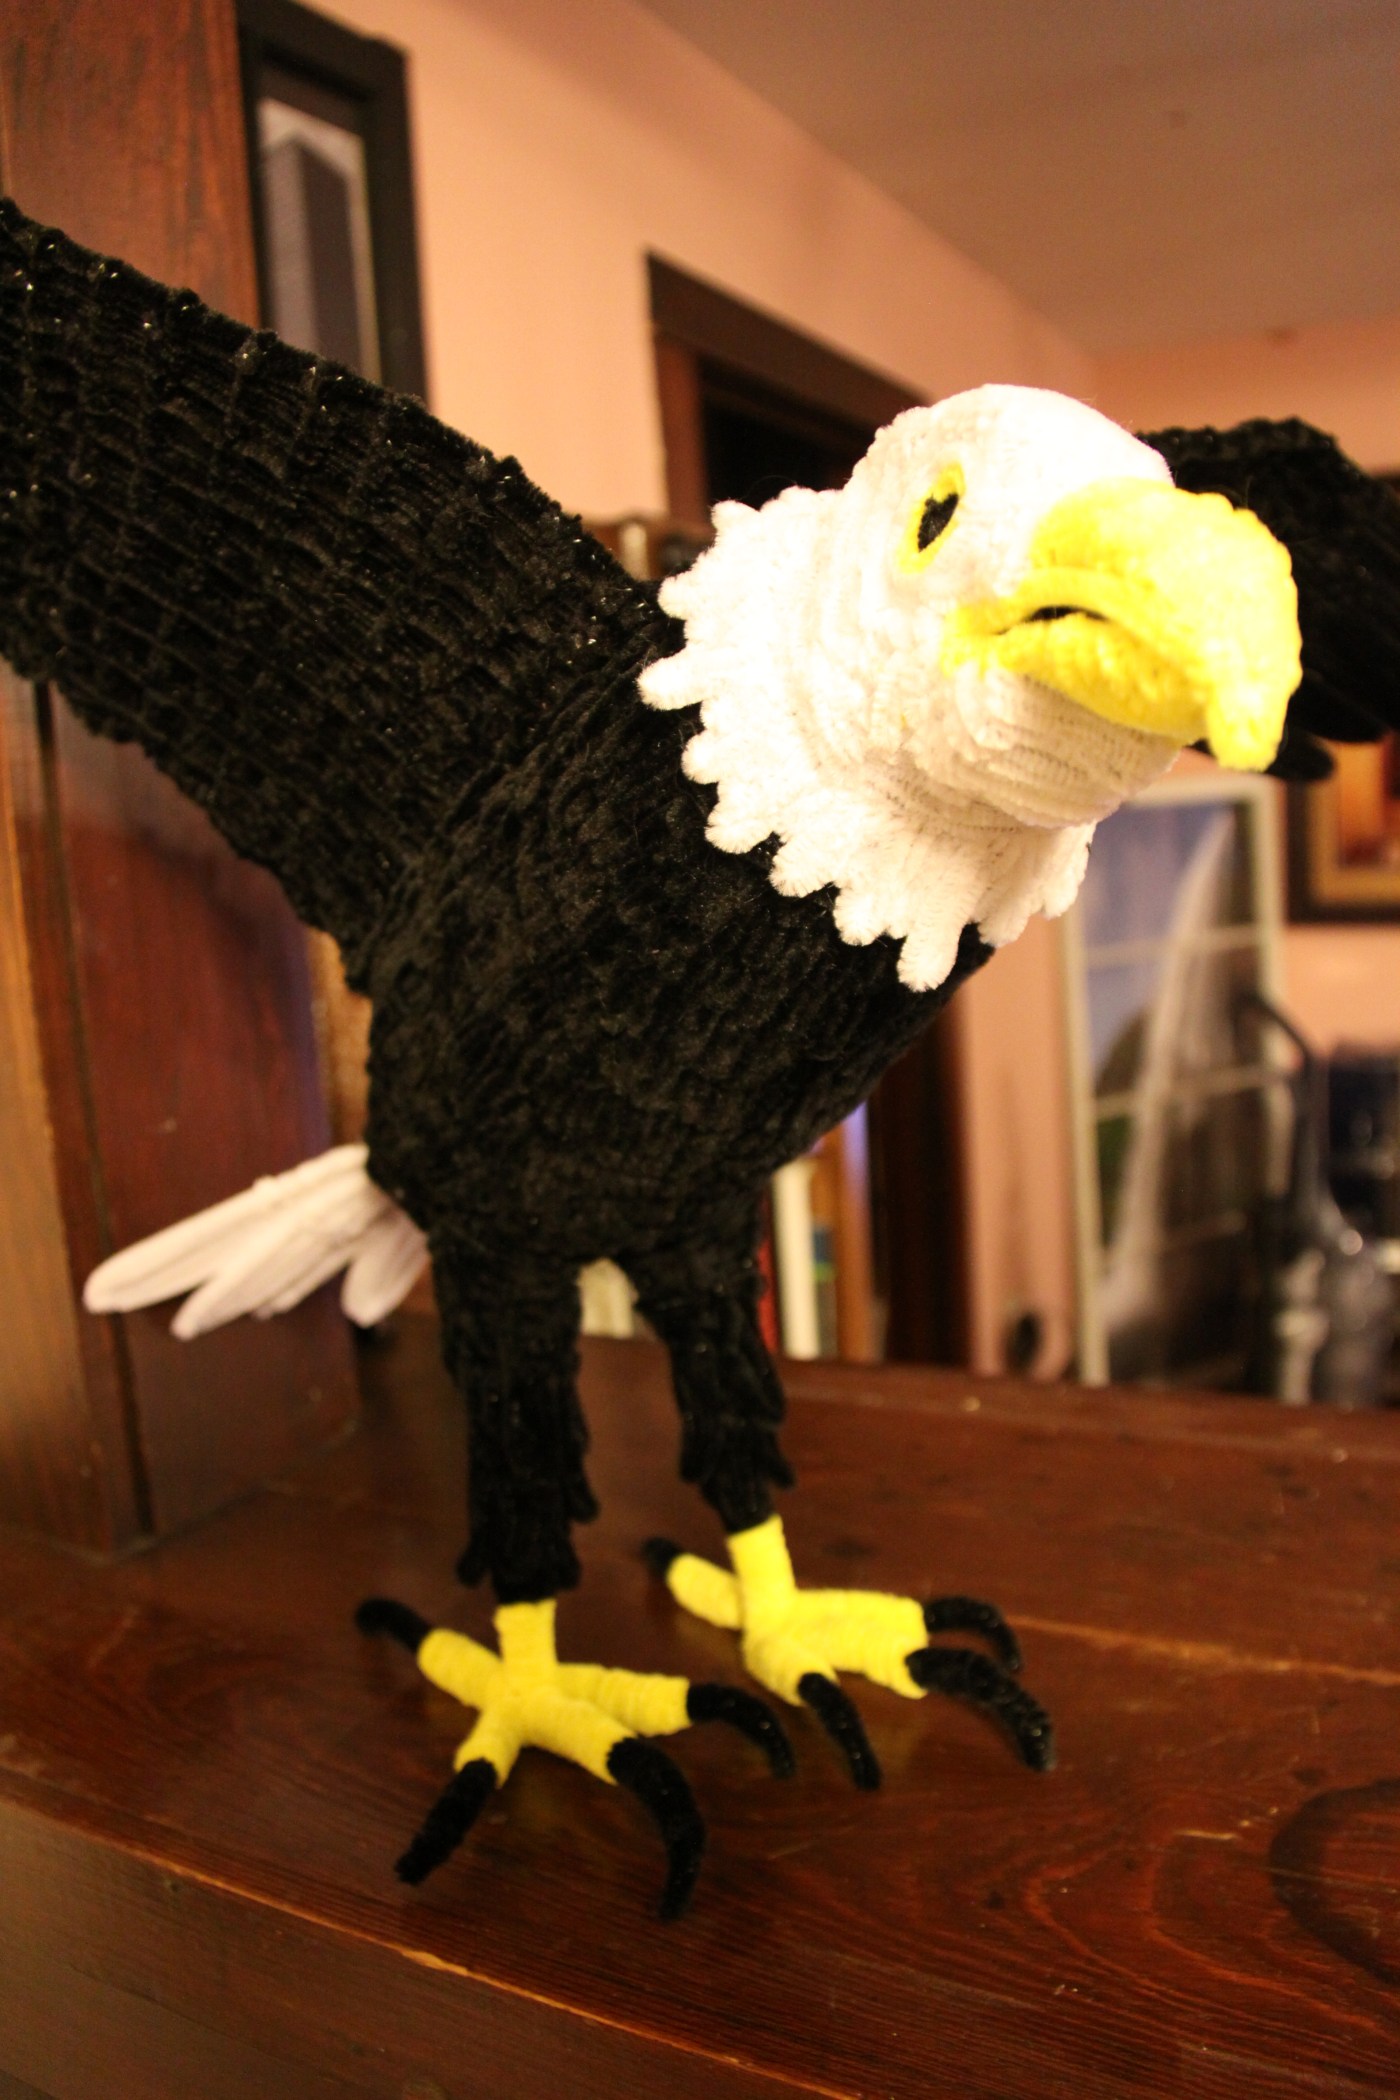
Following up on a previous post about my pipe cleaner eagle, I’d like to get into more details of the construction of this pipe cleaner animal.
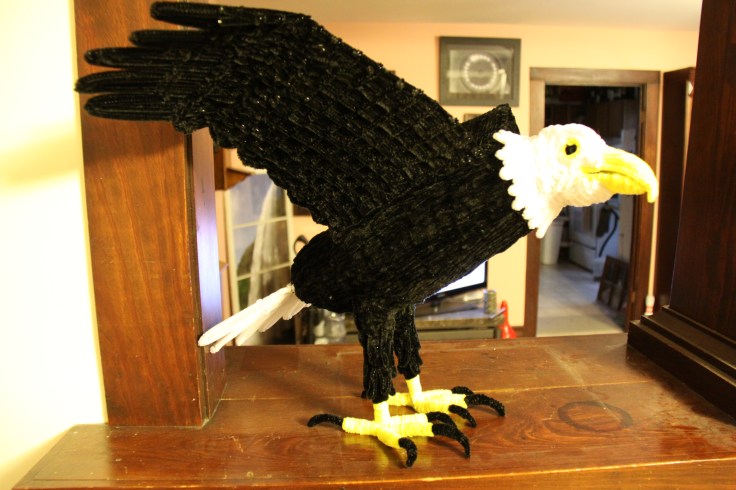
The eagle was built without too much difficulty due to the fairly simple construction, but his size meant he would be a long project (at least 40 hours). The most difficult aspects of its creation were the wings, which had be outstretched in a pose, and the legs, which needed to bear the weight of the entire creation (and there are only two legs instead of four as you would see on a typical animal, meaning each leg needs to hold twice as much weight as usual for an animal this size).
The first step was to frame out the body, face and wings all in one go, instead of building them separately then attaching. It just worked out best this way based on the shape of the eagle. To begin, the wings were simple attached to the body with no additional support structure to hold them in place, meaning they would droop down by gravity under their own weight. To keep them in the right place, temporary supports were added to keep them in place. The supports were simply single sticks of pipe cleaner attached from some place in the middle of the wing to the top of the body.


A rudimentary beak outline was created in two parts, a bottom beak and a top beak, so that the mouth would appear hollow, giving it a much better look than if the mouth/beak were completely closed off.
Once this general outline of the body, wings and beak was complete, the legs could be attached. Knowing that the legs would need to be extremely strong and rigid so the eagle would not collapse under its own weight, several pipe cleaners were bunched together to form the core of the legs (around 10-15 were used here). Simply bunching together these pipe cleaners and tying them tightly together at several points along the length of the leg will give them the necessary strength to keep them from bending or collapsing under its weight. ***Remember that adding coloring over the frame is going to add a significant amount of weight, so you need to account for this in judging how much strength the legs will need.


The talons were created separately out of a bunch of pipe cleaners bound together, then wrapped with additional pipe cleaners to give the the right shape and to make them rigid. Once the feet were complete they were pushed together into the legs so that the two groups of pipe cleaners overlapped and merged together. After that they were bound together using a few additional pipe cleaners.
At this point the wings are still unable to support their own weight. In order to make them more sturdy, additional connections were made a short way up the wing, connected to the body. Doing this along the full width of the wing is enough to give it the necessary extra strength to ensure that the wings stay in place even after coloring them in.
Once all the pieces were brought together (the body, wings, legs, feet/talons, and beak) it was just a simple matter of weaving pipe cleaners over the top of the frame to fill it in. A few additional details, like the ruffles of on the neck, the eyes, and the ruffles on the legs added a little more detail to ensure it looks like a proper animal. The final step was the tail, which was just some U-shaped sticks of pipe cleaner held together by another pipe cleaner. It took five of these next to each to give the full tail, and then that was attached to the body. Here are photos of all the different pieces in construction and then the final product.


For some easier projects, see the following.
A huge Pipe Cleaner spider (15 hour intermediate project)
Easy pipe cleaner frog (great project for kids)
And for an even more advanced project, check out the Pipe Cleaner Leopard.

How many of them will I need
LikeLike
Lots and lots. I didn’t count for this project, but you will need probably need a few hundred black pipe cleaners
LikeLike